I’ve been curious about 3D modeling of real-world objects for a while. Before I discovered GIS and web mapping back in ‘06, I was taking Digital Elevation Models (DEMs) and rendering Triangular Irregular Networks (TINs) with OpenGL. But how to produce those elevation models yourself? Or better yet how to produce a 3D point cloud that can represent a more complex 3D surface?
Fast forward 8 years into the smart phone and post-Microsoft Kinect era. InsideMaps is using standard smart phone cameras to model indoor spaces. Primesense, the maker of the Kinect sensor has just been bought by Apple, and their sensors are starting to show up in everything from Structure Sensor to Google’s Project Tango. Things are moving quickly in this space.
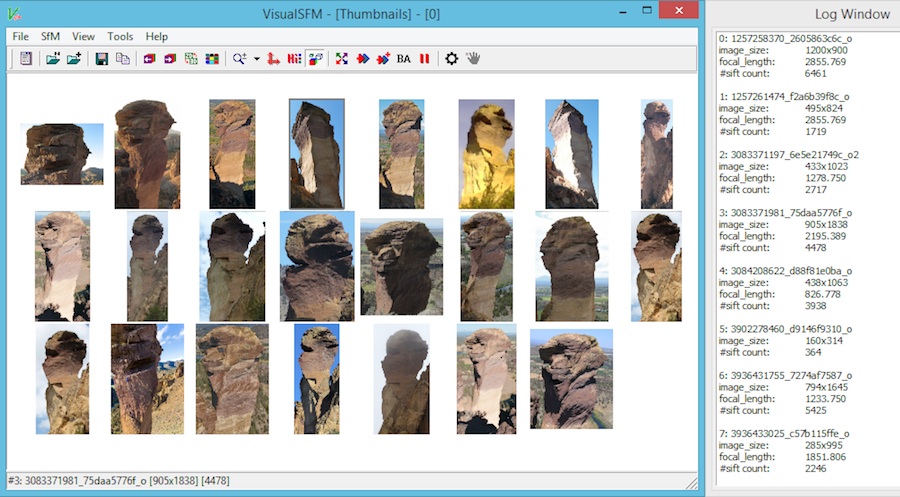
Great use of commodity hardware, but you don’t actually need it to do basic 3D modeling of objects I learned. You just need a set of images of an object taken from different overlapping perspectives, and a [Structure from Motion] tool that turns them into a 3D point cloud. A friend, Aaron Racicot pointed me at the freely available VisualSFM tool for doing this. The software itself is powerful, if a little bit unwieldy, as many academic tools are. But through trial-and-error I ended up learning a lot about the technique.
So here’s some of the steps I took to get setup and produce a workable final product, including relevant dead ends, hard to find instructions, and tips.
Getting up and running with VisualSFM
OSX
Step 1 was installation on OSX, which I failed at. But not for lack of trying! If you don’t care for the details of this failure, skip ahead.
The most recent binary was built for Lion back in 2012 and wouldn’t run on Mavericks so I went down the rabbit hole of compiling myself and never made it back out. To be fair, Changchang warned of this :)
* The installation on Mac OSX requires more work.
You probably need to make small modifications to the code.
Indeed. Even more, it turns out XCode for OSX Mavericks now uses the up-and-coming clang compiler instead of GCC. I quickly learned on the mailing list that others had hit a dead-end with clang. The person in the email thread did have success by installing a gcc compiler using Macports. Since I was well entrenched in using the Homebrew package manager, I opted for that direction.
brew install gcc49After a few PATH adjustments so that the GCC compiler was being used, I started manually stepping through the OSX install scripts in this Github project manually, starting with using Homebrew to install dependencies. And… things were compiling! But alas I started running into issues at the linking stage. I didn’t have the time or patience to resolve this problem at the time, but it may be due to Homebrew ignoring my PATH settings and continuing to use the clang compiler to install base libraries while I used gcc for VisualSFM and the more direct dependencies.
Back to Windows
So I bailed and opted for running VisualSFM in Windows with Virtualbox. I used a modern.ie VM and Changchang’s VisualSFM executable. What did I have to sacrifice by using a VM? Not being able to use the GPU on my graphics card for feature detection, which speeds up calculations significantly. Even adding Virtualbox Guest Additions and turning on 2D and 3D acceleration did not get VisualSFM to recognize or use the GPU in the Intel video card in my 2013 Macbook Pro. A small sacrifice to make I decided. I followed the instructions on this FAQ page under “CPU replacement for feature detection” to install a software equivalent instead.
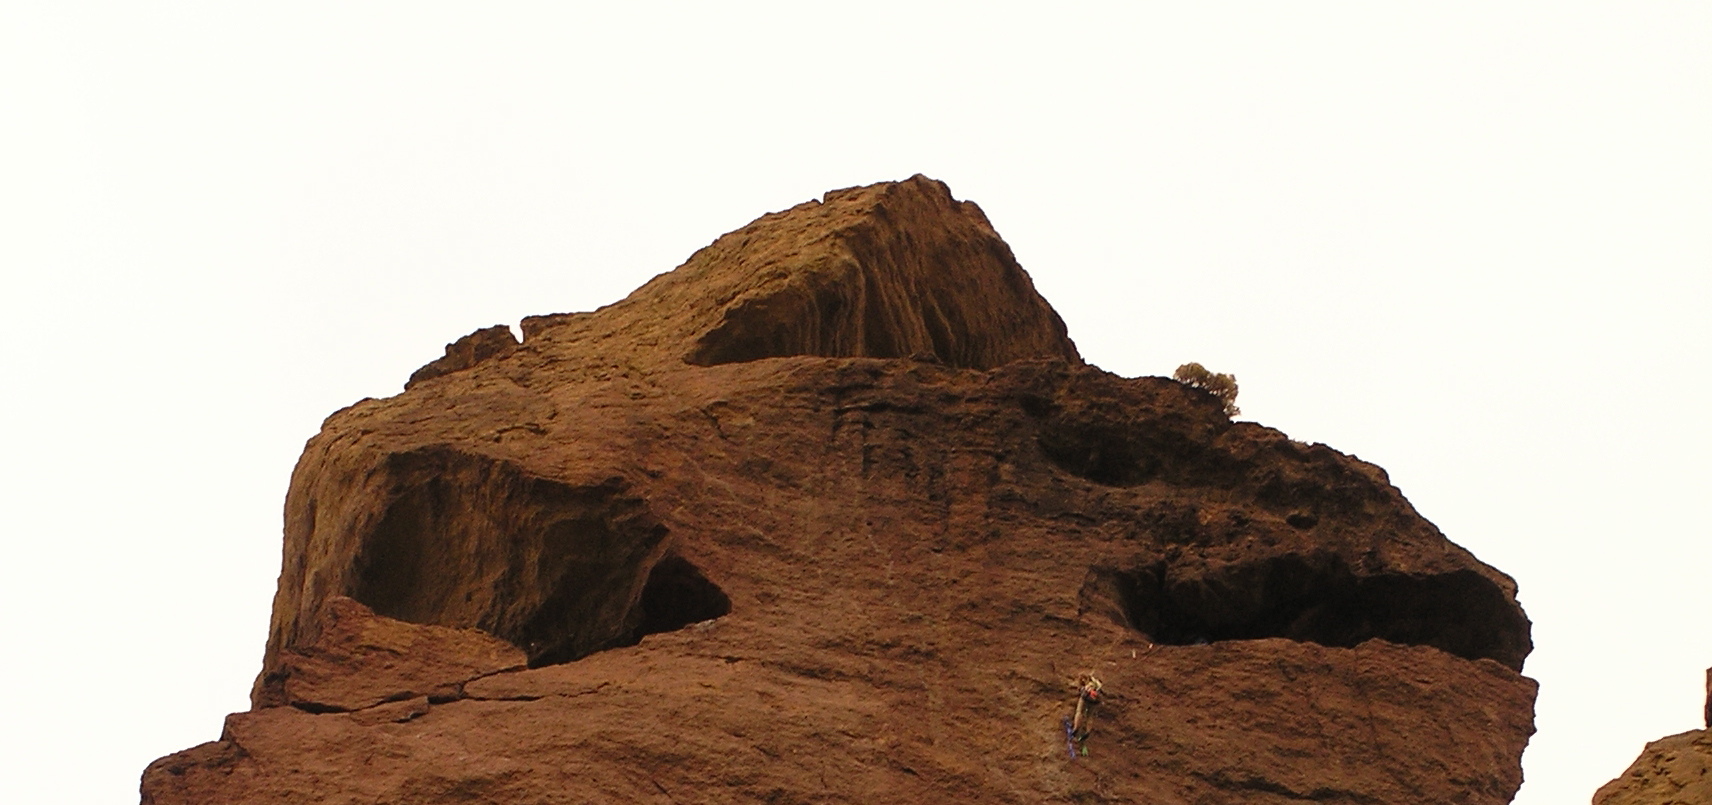
I thought I was home free at this point, on too the fun stuff! Instead of starting simple, and taking photos of an object on my table, I decided I was going to go bigger. Take a pile of photos from Flickr (licensed appropriately) of one of my favorite geologic landforms, Monkey Face (see feature image up top), reconstruct this baby in 3D, and before I knew it I’d be printing some coffee table centerpieces for my climber friends for Christmas (I’m a little more than half serious ;)
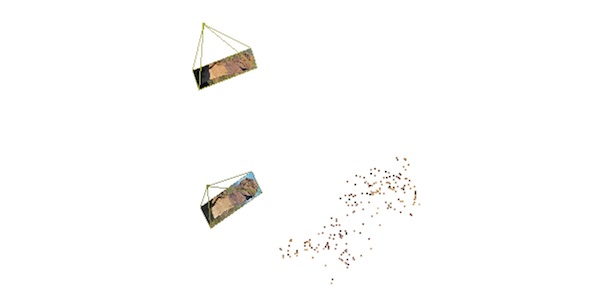
As it turns out, 3D reconstruction is a bit of an art for natural features. Anything with lots of distinct features and edges, particularly buildings and man-made objects seem to reconstruct well. More subtle objects need more images, and lots of overlap from one image to the next. Without that there’s not enough information to connect the camera views together into one model and you end up with fragments like this:
At first I didn’t realize Visual SFM was producing more than 1 model, but the log output said it created 5! I learned you could switch between each of the different models from the “N-View 3D Points” screen by using the up and down arrow. Scrolling your mouse wheel would increase or decrease the camera views so you could clearly see how each image was being placed in the 3D space and where the gaps were.
On closer inspection it became clear to me that people are really only taking photos of Monkey Face from maybe 3 different perspectives. They also don’t tend to capture the bottom or the top. If I was going to produce a decent model, I’d probably need to take an afternoon and travel the circumference shooting probably upwards of 200 photos and whittling it down to 100. And while I’m at it I should definitely climb it…
Back to Basics
What to do now? I took a look around the living room and pulled a wood turned pot off the shelf. I put it on the dining room table on top of a white towel. For good measure I added a couple other geometric objects into the scene to ensure there would be enough features detected. Then I shot 29 images from different angles.
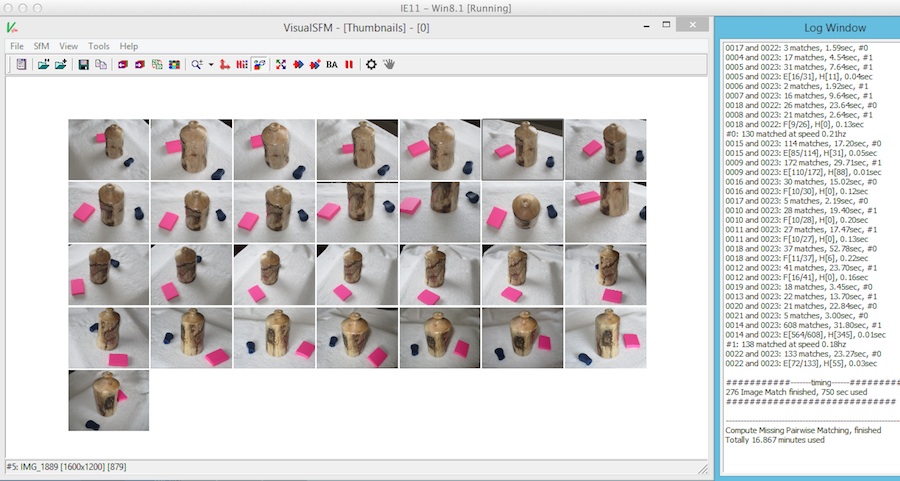
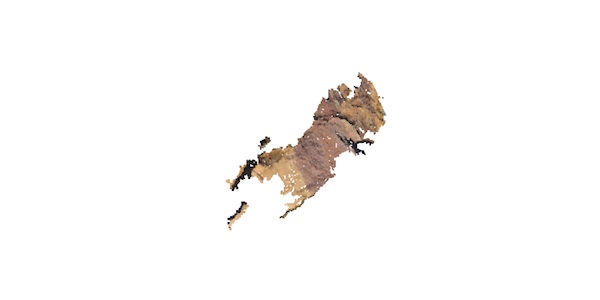
From there I ran the sparse reconstruction and managed to get 27 of 29 images used in a single model, excellent.

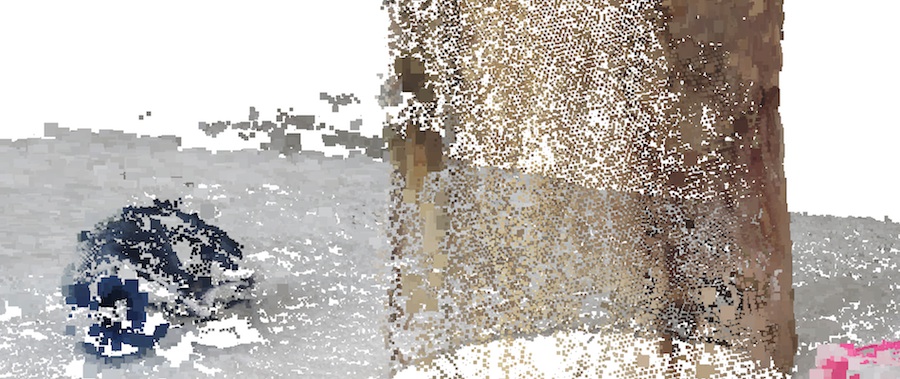
Running the dense reconstruction yielded a point cloud that was consistent around the entire object, finally! I cleaned up artifact points by hitting F1 and drawing rectangles around offending points and deleting them.

A Few Extra Tips
- Take care with your photos, don’t rush this step!
- Make sure the exif information is included with all of your images. The software needs information about your camera sensor and focal ratio.
- Large images can cause errors. If necessary, reduce your photo resolution to 1200px or below.
- Remove photos with a lot of direct sunlight and glare, or with wildly different exposure. This alone can generate additional models. Then rerun your sparse reconstruction.
Taking it further with Meshlab
The point density produced through this technique is plenty high enough to produce a 3D model. This can be done with the open source project Meshlab. There are some great tutorials online showing you how to do this. One warning, Meshlab is known to crash once in a while with certain point clouds. This was the case with many of mine. Good luck!